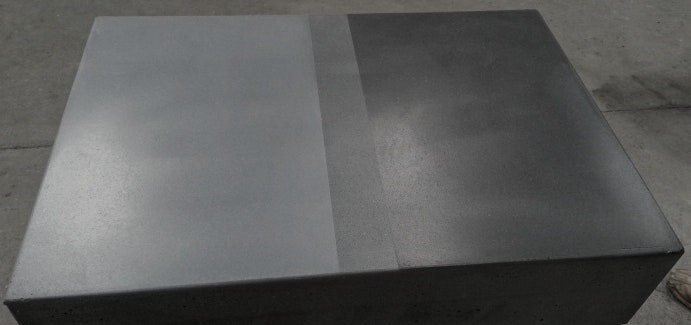
Refinishing Concrete Countertops
One of the most frequent questions we get sounds something like this-
"I want to refinish my concrete countertops, what do I do? I don't know who made them, or what they used to seal them with, and everything on the internet seems to conflict with everything else! Help!"
Resealing concrete countertops is a process. Let's walk through what that process may look like for you.
First things first, what sealer is on your countertops?
You may not have an answer for this, but you will want to try your hardest to find out. Every sealer requires a slightly different approach, and knowing what you are up against will inform the rest of the process. If you can't figure out what sealer it is, we will address that in a bit. If your countertops were sealed with the Buddy Rhodes system, your process will be relatively simple.
What shape is your countertop in?
Has your concrete just lost it’s ‘pop’? If so, a little wax and a buff may be all you need. If your concrete is absorbing water, seeing staining or etching, then you will need to figure out how far to take the process. You may want to spot fix problem areas, or, as daunting as it may seem, stripping and resealing the entire piece may prove to take less time and give a better result than trying to chase spots will. In the case of sinks that have seen lots of wear, just refinishing a sink is not hard to do, just tape off the transition between sink and countertop.
What will you use to reseal your countertops?
There is no perfect sealer for concrete countertops. Artisans everywhere pray that one day we will overcome this simple fact, and people everywhere are searching for this holy grail. Much progress has been made in the past years, but we still aren't there yet. For every 'pro' a sealer offers you, there is a 'con'. It won't stain but it will scratch, it wont scratch, but it will stain, and so on.
Having run professional studios ourselves, we are settled on 3 different technologies. We have come to this conclusion by weighing a number of factors, including protection, ease of application, repairability, and aesthetic.
- The first is what Buddy has been promoting all along, a penetrating sealer followed by a satin acrylic. This is a simple to apply and repair system that offers good protection against the common kitchen environment. It is not bombproof, but if something happens it can be repaired with relative ease compared to other sealers. Often a wax is used, more on that later.
- The next system is a reactive sealer combination that requires quite a bit more commitment on the users part, and the final result is very much contingent on the concrete it is being applied to. When well applied, it is as good a sealer as exists, but because it is contingent on the concrete it is applied to, there is a complex set of variables that come into play. If you want more information about this sealer, contact us. (In many cases people will replace the Penetrating Sealer in Buddy’s system with the first step (CH Prep) of the reactive sealer, followed by the satin acrylic sealer. This is for people in the middle of the road between wanting it to be simple, and willing to commit some time and effort for slightly better protection. Again, if you fancy this, contact us.)
- The newest sealer to our offerings is our Reactive Urethane Sealer. This is a urethane sealer combined with a reactive component. It performance coating that provides consistent results for stain resistance, ans is relatively easy to apply. As with all coatings, scratching is the main drawback.
Now that we have outlined where we are, and where we are going, let’s figure out how to get there.
If your sealer looks pretty good, and it has just lost it’s shine, then applying some wax maybe all you need to do. You can read more about wax later. If you have used the Buddy Rhodes system and not used wax, you can lightly scuff the sealer with 400 grit regular sand paper, and apply a fresh coat of Buddy Rhodes Satin Sealer.
If you just have a problem spot, then you may want to lightly sand that area, feather it out a bit, then reapply sealer to the problem area. Be aware, this can cause color inconsistency to varying extents depending on the conditions. More on sanding the concrete and the color variations in a bit.
If you are seeing lots of water absorption, etching, staining, or serious scratching, then you will want to consider more extensive efforts. Even if your countertops aren’t wrecked, stripping and resealing may provide the best result. Then you will have a consistent base to work from, you will have a chance to sand away stains or etches, and everything will have been treated equally increasing the chance that you will end up with a uniform and consistent result. There are 2 ways to go about removing sealer.
- You can chemically strip the sealer. Every sealer will use a different type of stripper, some more stinky than others. For Buddy Rhodes’ Satin, you will use lacquer thinner, which can be found at any hardware store. Strip, remove residue, and clean with soap and water to make sure everything is cleaned up before proceeding.
- You can also sand off your sealer. If you don’t know what kind of sealer you have, then this is probably the best route to take. Also, if there is alot of wear and tear on your countertop that will require sanding later in the process, then it may make sense to start with sanding and not hassle with chemically stripping.
Prior to removing the sealer, you may have pinholes that you want to see filled in. Filling these prior to removing the sealer is easier in some cases than applying to raw unsealed concrete. Once the concrete is raw, then you will need to sand off the paste entirely after filling the holes, otherwise the paste will stain the concrete. You will mix us some Bone Paste with color pigments to match the color of your countertops. Don't know what color you have, then you will need to blend up a color to match what you have. Look at the available colors, then blend colors like you would blending paint colors to get a desired color. Having the paste match your slab perfectly is something of a dark art, you can always try some tests and allow them to dry to see how they will look.
If your concrete countertops have been decoratively stained, this will increase your challenge. There are numerous ways of staining and types of stains. If you sand the countertops, you are likely to remove much if not all of the stain. Chemically stripping may be the route to take with stained countertops in an effort to preserve the stain. If you remove the stain, you can use our glazes to re-tint your countertops. It is water-based and doesn't contain acids. It behaves similarly to wood glaze.
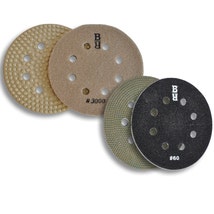
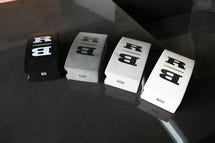
Sanding sounds messy. While we wouldn’t recommend doing this work in your Sunday’s best, it doesn’t need to destroy the surroundings. Picking the right tools helps. Take clear packing tape, and run it around the border of your countertop with 1” sticking up above the countertop surface. Fold that 1” down in half, which will create a ½” dam around your countertop. This will keep the mess from going everywhere. Use diamond impregnated random orbital sanding pads, similar to the picture below, on an air-powered random orbital sander, and keep your surface wet. You can use the hand pads for tight areas or for small touch ups. What grits you use will depend on your sealer choice, and personal preference. With the majority of sealers, which would prefer a little ‘tooth’ in the surface to grab onto, sanding much above 200 grit is not necessary and maybe even detrimental. You can use regular sandpaper, but it will wear out almost instantly, likely leaving an inconsistent polish. The diamond pads will be more consistent and have a life that will last beyond one countertop.
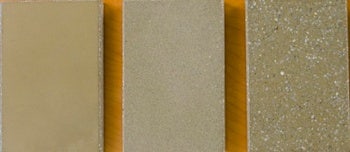
Concrete has layers when it is made, whether troweled right side up, or cast into a mold. The top surface has a very fine paste (left). If you sand a little bit you will expose a layer of sand just underneath that paste, creating a salt and pepper look in most cases(middle). Sand a bit more and you start to fully expose those sand grains and any aggregate that is in the mix(right). Eventually you will sand deep enough that all the aggregate is fully exposed. This is important to understand when resealing your countertops, the less sand and aggregate is exposed at the beginning of the process, the more change you are likely to see when sanding. The older the concrete is, the harder it will be and the longer it will take to grind and polish.
Once removing the sealer, and polishing out your problem spots, check to see if water absorbs evenly into your concrete. If you have areas that are not absorbing or are visually problematic, then you will want to continue working to get the concrete ready for new sealer. Clean up and allow everything to dry out for 24 hours.
Let's Finish Up
Now that you have considered the process of refinishing your concrete countertops, and prepared the concrete for resealing, it is time for actually sealing your concrete countertops. Depending on what sealer you have chosen, you will want to follow the manufacturers instructions. If you have chosen a sealer other than the ones we offer, then be certain your surface prep is as it should be. Much of the failure in applying sealers can be traced back to poor surface prep, and in the case of coatings, having concrete that is too smooth for the sealer.
Be sure your space is clean, and the things that are in close proximity to your countertops are protected from the sealer. Sealer dripping onto your nice backsplash or polished stainless steel appliances will be sure to lead to cussing. No need for that.
Environment plays a role in virtually every sealer. Extreme situations of heat or cold should be avoided in most cases. Take your time between any water exposure to the countertops, and application of sealer.
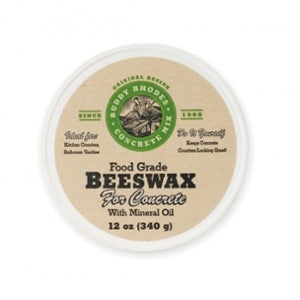 To wax or not to wax? Wax is a double edged sword. It provides a good sacrificial layer against wear and tear, and is a nice way to keep countertops looking fresh with minimal work. The downside is that it can be hard to fully remove in case you want to do spot touch-ups or a quick reseal. For instance, without wax you could simply scuff the Buddy Rhodes Satin Sealer with a light sandpaper, wipe clean, and immediately reapply a fresh coat of sealer. The wax reduces the chance that you would need to do this, but makes it harder refinish if it is there. The call is yours to make.
